Domestic Gothess’ Maple Cookie Wreath
Sweet Treats / Christmas / Christmas / Influencer
Ingredients
FOR THE MAPLE COOKIES
- 300g vegan block butter, softened
- 150g light brown soft sugar
- 100g light brown soft sugar
- 150ml maple syrup (preferably amber syrup for its rich taste)
- 3/4 tsp salt
- 1/2 tsp baking powder
- 500g plain (all-purpose) flour
FOR THE ROYAL ICING
- 45g aquafaba (scant 3 tbsps)
- 275g icing sugar
- 2 tsp maple syrup (preferably amber syrup for its rich taste)
- Juice of 1/2 lemon
TO DECORATE
- Gel food colouring in red, yellow, green, chestnut brown and dark brown
Method
TO MAKE THE MAPLE COOKIES
- Place the softened vegan block butter and light brown soft sugar in a large bowl and whisk together with an electric mixer for several minutes until fluffy and well combined
- Whisk in the maple syrup followed by the salt and baking powder, the mixture may look curdled (this is normal)
- Add plain flour and stir through until the mixture forms a soft dough then divide into two portions, shape into discs, wrap and place in the fridge for at least a couple of hours, until the dough is firm
- Once the dough is firm enough to roll out, dust a sheet of baking parchment with flour and place one of the discs of dough on top. Dust with more flour and roll out to a large circle about 3mm/1/8 inch thick
- Use the base of an approx. 28cm/11in round cake tin or dinner plate to cut out a large circle then use an approx. 18cm/7in one to cut a smaller circle out of the centre, leaving you with a large ring
- Slide the sheet of baking parchment onto a baking sheet and pop it in the freezer for 15 minutes (or the fridge for 30) while you preheat the oven. Bake the ring for about 20 minutes until it is golden brown
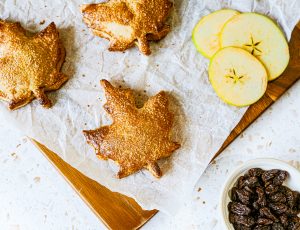
- While the ring is baking, roll out the other disc of dough as above and cut out leaf shapes using your cookie cutters. Place them spaced apart on a couple of baking sheets lined with baking parchment and pop in the freezer for 15 minutes
- Bake the chilled cookies for about 10-12 minutes until they are golden around the edges
- Once the cookies have cooled place them in an airtight container overnight
TO MAKE THE ROYAL ICING
- Place the aquafaba in a clean, dry bowl (make sure there is no grease on the bowl, or it can prevent the aquafaba from whipping up properly) and whisk with an electric mixer until it is good and frothy
- Sift in the icing sugar and whisk for about 5 minutes until very thick and glossy and the mixture forms soft peaks. When you lift the beaters out of the bowl it should form a droopy peak but not drop off the beater
- Whisk in some maple syrup then gradually stir in a little lemon juice, ½ tsp at a time, until the icing becomes a thick but pourable consistency. If you drizzle some of the mixture back into the bowl the pattern should disappear after about 8 seconds. If it becomes too runny you can whisk in a little more icing sugar to thicken it back up again
- Divide the icing into 5 small bowls. Use gel food colouring to colour one red, one yellow, one orange (red plus yellow colouring), one green and one chestnut brown. Add a little chestnut brown colouring to each of the coloured ones to make them more of a realistic leaf colour
TO CONSTRUCT
- Use a teaspoon to carefully spread some of the icing over the top of each biscuit, making each one a different colour. Use the edge of the spoon to gently nudge the icing towards the edge of the biscuit to get a clean line, making sure that you don’t push it over the edge
- Place the iced biscuits on a couple of baking sheets and place them in a very low oven for about 30 minutes until the icing is dry. (You can leave them to air dry at room temperature instead, but they will take around 3-4 hours)
- Once the icing has dried, place about ½ tsp gel food colouring in a small bowl – one bowl of dark brown, one chestnut brown and one red. Stir about a teaspoon of water into each one. Use a fine paintbrush to paint veins onto each leaf using the dark brown; then use the chestnut and red to add detail and shading as you like. Set aside to dry
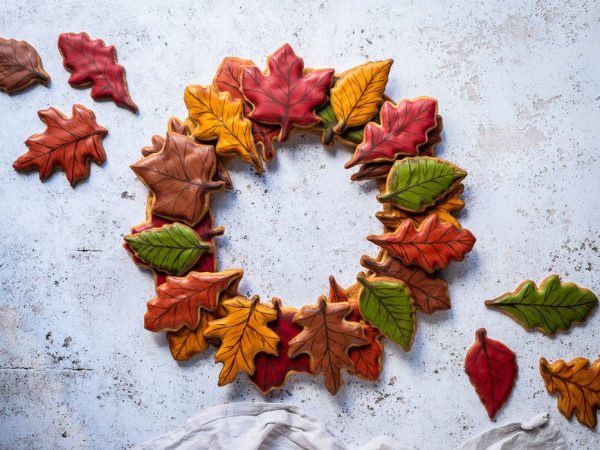
- Once the paint has dried, use blobs of the leftover royal icing to stick the leaves to the biscuit ring, placing them in a circle then adding some more on top. You will not need all of the leaves. Set aside for a couple of hours to dry
TOP TIP
- It is best to make this maple cookie wreath over the course of a couple of days. I make the dough and bake the cookies on the first day, then ice and paint the biscuits and assemble the wreath the following day
The cutest Christmas cookies to enjoy throughout the festive season! Pure Canadian maple syrup adds a splash of sweetness to these delicious vegan cookies which depict the leaves of the tree from which this magical syrup is derived. This cookie recipe takes several hours to put together, so you may want to spread the process over a two-day period.
Find more great recipes and imagery by Domestic Gothess here.
The Quebec Maple Syrup Producers are not in any way responsible for the identification or presence of allergens in recipes or for the classification of any recipe as vegetarian or vegan.
Hundreds of Delicious Recipes
Maple is a special addition to any recipe, from starters and snacks to sumptuous desserts. Find one that’s perfect for you, your family and friends.
)

